


How To Add Crown Molding to Your Cabinets
Adding crown molding is a practical way to elevate the appearance of your cabinets, adding a built-in finish to any kitchen or living space. If you have admired kitchens with that seamless, tailored look, learning how to add crown molding to your cabinets can help you achieve it without a total renovation.
This guide will take you through each stage of the process, ensuring that you understand the technical steps and the stylistic choices that influence the result. Whether you are updating older cabinets or looking to add character to a new installation, this post will answer key questions about selecting, preparing, and installing crown molding above wall cabinets.
Understanding Crown Molding and Its Impact
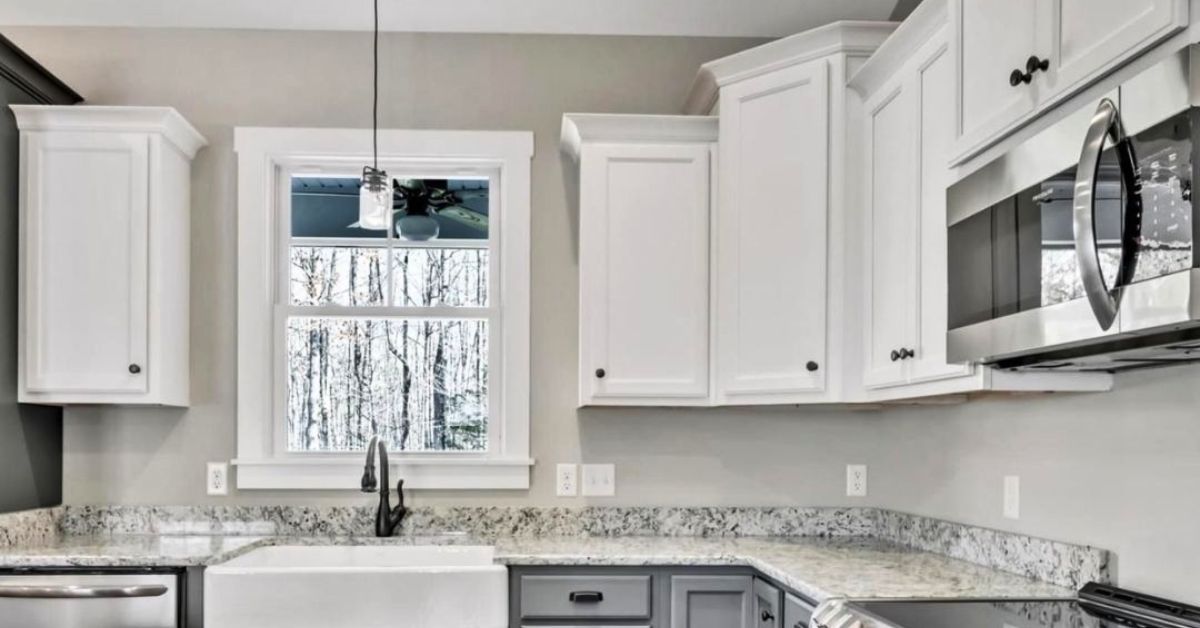
Before you begin, it is important to understand what crown molding is and why adding it to cabinetry instantly enhances the room. Crown molding refers to the decorative trim installed at the intersection where the cabinets meet the ceiling or upper wall. Its primary purpose is aesthetic, covering gaps and inconsistencies while introducing an elegant transition that draws the eye upward and adds a sense of height to the space.
Selecting crown molding means considering proportions, profiles, and materials that will harmonize with your cabinet style and the rest of your decor. European-style kitchen cabinets often feature clean lines, but well-chosen molding can add warmth even to minimalist designs. For more traditional hardwood kitchen cabinetry, a detailed profile can tie together classic hardware and finishes. The right choice will make cabinets appear custom-built rather than modular or stock.
Tools and Materials You Will Need
Preparation is key for a precise finish. Proper tools minimize errors and ensure each piece fits flush for a seamless look. Here’s what you’ll need:
- a miter saw for angled cuts
- a measuring tape
- a pencil for marking
- construction adhesive
- finishing nails
- a nail gun
- a level for alignment checks
- wood filler
- caulk
- touch-up paint matching your cabinet color
Measuring Your Cabinets for Crown Molding
When selecting crown molding, review the full range of widths and profiles. Consider the cabinet height, ceiling clearance, and room style. Bring a cabinet door to the store to compare finishes and proportions if possible.
Accurate measurements are critical when adding crown molding to your cabinets. Always start by measuring the length of each section where you plan to install the trim. Measure twice, and allow for outside and inside corners, as these require precise angled cuts.
Keep in mind that crown molding rarely comes in exact lengths. Buy extra to accommodate mistakes and overlapping seams, and remember that some profiles have deeper projections from the wall, which alters the fit at corners and against the cabinet face.
Draw a diagram of your cabinet layout. Mark the start and end points for each molding section, and lightly pencil these on the cabinet tops as a reference. Pay attention to protrusions such as light rail molding or taller corner cabinets, as they may affect your plan.
Cutting Your Crown Molding
Miter cuts require careful attention to detail. Set your miter saw to the correct angle, which is typically 45 degrees for corners, then test the fit with small off-cuts before starting on the molding pieces. This step is especially important if your walls are not completely square, which is a common issue in many homes.
When placing the molding in the miter saw, orient it in the same direction it will be installed. Cut slowly and consistently to avoid splintering the finish. Label each piece as you go so you don’t lose track of its intended location in your installation sequence.
Double-check your cuts before proceeding. Small gaps can usually be filled with caulk, but large misalignments will require a new cut or even a new piece, which adds time and cost.
Attaching Crown Molding to Your Cabinets
Once your pieces are test-fitted and positioned, you are ready for attachment. Begin at the most visible area, usually the cabinet run that faces into the room. Apply construction adhesive to the back of each molding piece. Carefully press it into place, then secure it with finishing nails driven into the solid frame of the cabinet.
A nail gun, if available, speeds up this step and provides even pressure, preventing the molding from shifting while the adhesive sets. For outside corners, connect the mitered joints before attaching to the cabinet to guarantee a tight, professional appearance.
Check the level periodically as you move from section to section. Even slight deviations at the start can create visible gaps by the end, so make corrections as needed. If you encounter uneven cabinet surfaces, add shims behind the molding to maintain a straight line.
Finishing Touches for a Seamless Look
With all the pieces attached, move on to finishing the installation. Use wood filler to fill visible nail holes and joints between molding sections. Once dry, smooth the filler with fine-grit sandpaper, and remove any dust with a lint-free cloth.
Apply paint or stain as needed, matching the color of your cabinets for a cohesive finish. If you used pre-finished molding, and the finish was scratched during installation, touch these areas up for a flawless appearance.
Run a thin bead of paintable caulk along the top and bottom edges to hide small gaps between the molding and the cabinet or ceiling. Smooth the caulk line with a finger dipped in water for a professional, subtle finish.
Design Considerations To Elevate Your Results
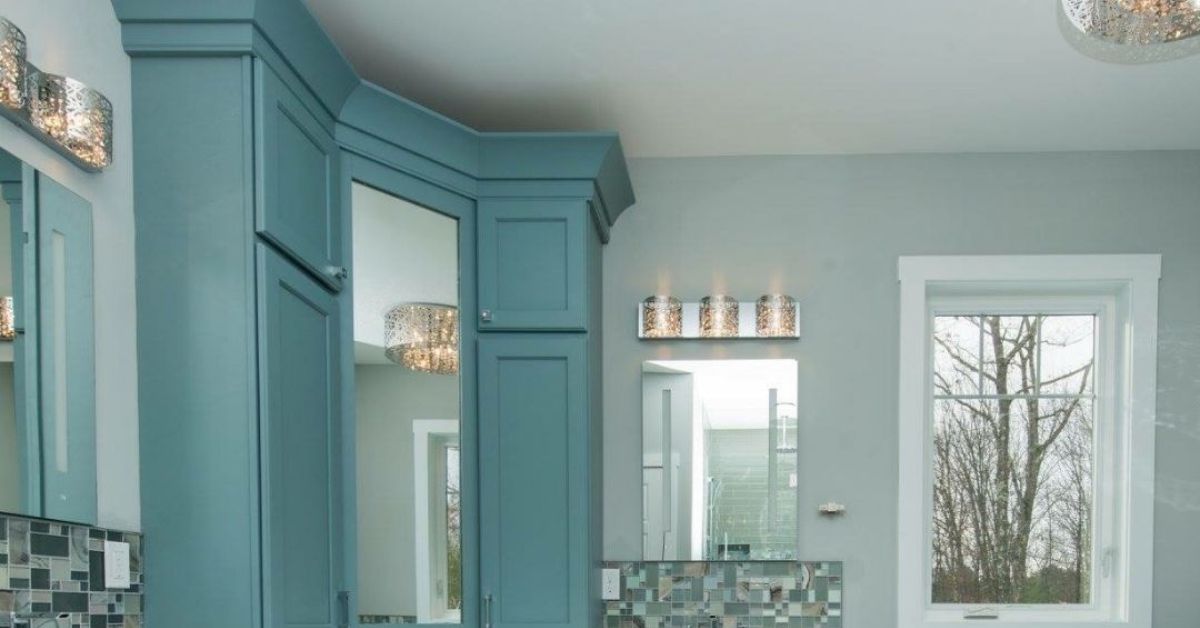
Choosing the right style and size of crown molding can be just as important as the quality of the installation. Wider profiles make a bolder statement in rooms with high ceilings, while simple, narrow molding aligns with modern aesthetics and lower ceilings.
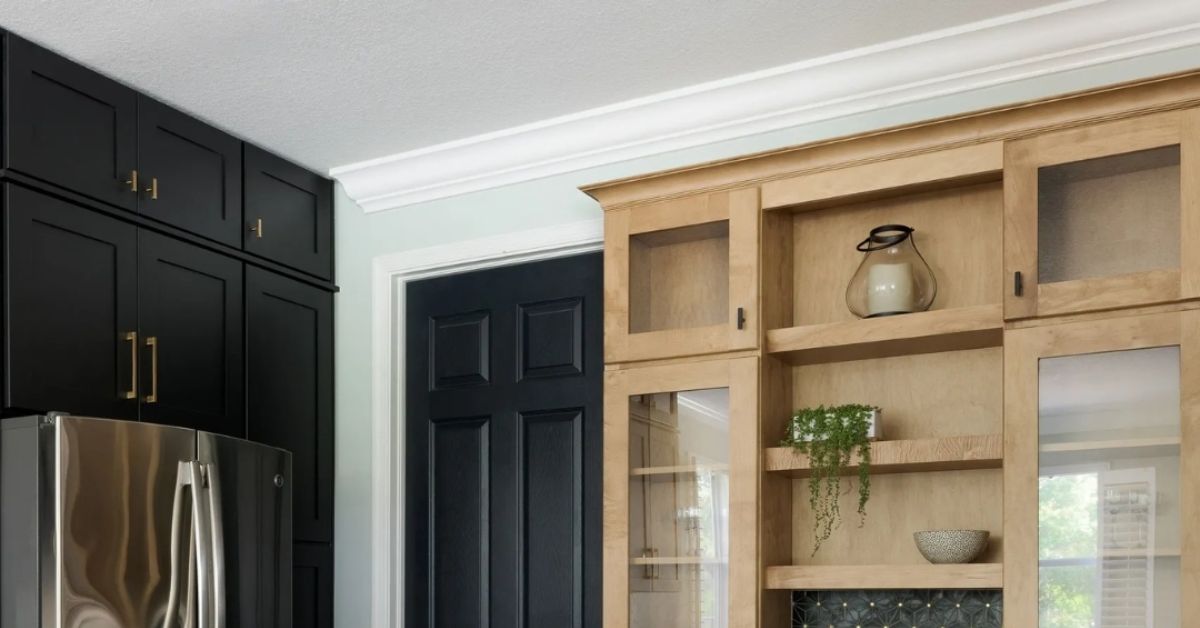
Paint color plays a significant role. Matching the molding to the cabinet finish creates a built-in effect for most kitchens. For contrast, try a complementary color that matches the ceiling or other woodwork in the room.
Molding can also be layered for an even more custom look. Pair a traditional crown profile with a slim cove or rope molding underneath to create depth. This approach requires precise measurement and planning, resulting in a unique aesthetic.
If your cabinets do not reach the ceiling, consider using a riser or filler strip above the cabinet box and attaching the crown molding there for extra height and a seamless finish.
The Difference of a Professional Touch
Undertaking a project like this yourself can be rewarding, both financially and in terms of satisfaction with your space. However, if you have never installed trim before, it may be worth consulting with a professional or experienced carpenter for the planning phase. They can advise on the nuances of crown molding installation, especially if you have irregular ceiling lines or high-value materials like hardwood or lacquered finishes.
Some companies offer custom-cut molding kits for DIY projects, which can save time and reduce the likelihood of errors. Always review your options, and select materials and products that fit your skill level and desired outcome.
Take Your Kitchen Cabinets to the Next Level
Adding crown molding is one of the most effective ways to upgrade your kitchen or living area with minimal disruption. By following this guide to adding crown molding to your cabinets, you can achieve high-end results tailored to your style and budget. Whether replicating that built-in look seen in custom homes or modernizing old cabinets, this upgrade offers strong visual rewards that many home improvement enthusiasts can achieve.